#1 Social Media Marketplace
Accelerate Your Social Media Growth with SocialWick. Quickly gain real followers, viewers, likes & more with our blend of marketing tactics. SocialWick is known for its fast delivery, premium quality, and low prices. With over a million satisfied customers since 2017, trust SocialWick to take your social media game to the next level.
1.4 M
Customers
13 M
Orders
362 M
Followers sold
1.8 B
Likes sold
Set Up Facebook Pixel to Track Conversions
Published on 04.01.2025 by Tracey Chizoba Fletcher
Keeping track of who visits your websites and what they do while on your website is a pretty useful marketing tactic. It gives you a clearer view of what your customers are doing and that lets you prepare better for new, potential consumers. If you’re unsure about who’s coming to your site, why run your entire marketing plan? That’s where Facebook Pixel comes in. Don’t worry if you can’t find “Facebook Pixel” anymore. They’ve rebranded this feature to “Meta Pixel.”
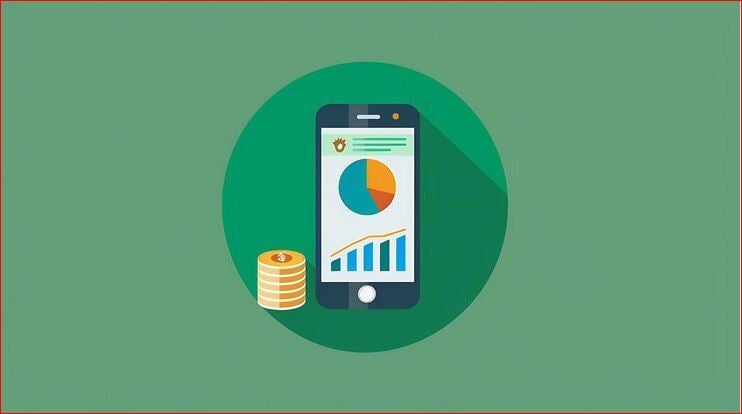
The Facebook/Meta pixel is an extremely useful marketing tool that lets you get customer insights from your Facebook Ad Account. This lets you keep a tracker on customers who are coming to your site and what they’re doing. With the results and the data that you come across, you can refine your Facebook Ads into something that’s personal to your customer base. If you’re aiming to see the effect of your online efforts, setting up your Facebook Pixel is crucial, and you’re in the right place to learn more about this tool. Read on to figure out why Meta Pixel is important and how you can set it up for yourself.

What is Facebook/Meta Pixel?
The Facebook Pixel is part of a code that you add to your site to follow customer activity and their behaviour. It runs in the background of your website collecting data and the data will help you keep track of the effectiveness of your ads. In turn, it will help you improve your ad campaigns and make targeted ads for future audiences. The tool also lets you re-target visitors that have come to your website once before. Think of it like coming across multiple ads about this one website that you visited earlier in the day/week.
The Facebook Pixel tool also measures conversions, which is essentially your audience clicking on your ads and making a purchase. Conversions also refer to signing up for your services or downloading something from your website. By tracking conversions such as these, you can get a much better idea of how people are using your site, and that tells you which ads are actually working for you.
The Meta Pixel works alongside the Facebook Ads Manager. This lets you create data-driven plans that can make the most given your budget. The tool acts as a link from your site to your advertising account, ensuring that you can check what effect your efforts have on customer behaviour. So whether you’re working with a small shop or following a large marketing plan, the Pixel is a very important tool that helps you know how well you’re doing.
The Benefits of Using the Meta Pixel
The Pixel is considered a vital tool mostly because of the benefits that it has. One of the main functions of the Pixel is its ability to track conversions. This feature lets you monitor user actions such as people adding things to their shopping list or completing a purchase. This can also involve users filling out a survey. The data helps you identify which ads are bringing in the results that you want and that helps you decide which of your ads needs to be re-worked.
The Facebook Pixel also helps you build an audience which is crucial for any marketing plan. With the Pixel, you can make custom audiences for retargeting based on the specific actions that they did on your website. It’s like grouping all the people who added specific items to their carts but never completed that purchase. This confirms that your ads are going to users who already have an idea about the things you’re offering, which increases the likelihood of people completing their purchases.
Another Facebook Pixel benefit is ad optimization. Think of it like improving upon the ads that you’ve already put up. The Pixel collects data to serve ads to users more likely to convert. As a result, this makes your marketing campaigns more efficient. With the Pixel, you’ll also have the chance to see advanced insights such as granular reporting which can improve your overall strategy. Additionally, the Pixel allows cross device tracking which lets you know if your ads are getting more mobile users.

Steps to Set Up the Facebook Pixel
Step 1 – Making a Facebook Pixel
- You’ll need to start by making the Pixel.
- Log in to your Facebook Business Manager.
- Head to the Events Manager section.
- Click on Connect Data Sources.
- Select Web.
- Select the Facebook Pixel option, then hit Connect.
- Add a descriptive name and your website’s URL. We suggest naming the Pixel clearly so it doesn’t mix with other Pixels that you create later on.
- Hit Continue to finish setting up.
Creating the Meta Pixel is simple but being accurate with it is what’s important. The creation of your Facebook Pixel sets up what you’ll be doing later on, so we recommend going through the settings once more to be sure it is the way you want it. When you start managing multiple websites, create separate Pixels for each site to keep all the data organized.
Step 2 – Adding the Pixel Code to Your Website
Now, let’s start integrating:
- Copy the Pixel Base Code given in the Events Manager.
- Put it into the <head> area of your website code.
- If editing isn’t your forte, use Google Tag Manager.
- Create a new tag with GTM.
- Select the custom HTML option.
- Add your Pixel Base Code.
For website developers that work with content management systems or platforms like WordPress/Shopify/Wix, the process is a lot easier. These platforms offer plugins that allow you to directly integrate the Facebook Pixel without needing any technical skills. Each platform has its instructions, so use those.
Step 3 – Verifying the Meta Pixel Installation
Lastly, make sure your Pixel has installed properly. Check on the Facebook Pixel Helper extension to confirm the installation. Head to your website and check if the extension can detect the Pixel. If you come across error messages, address them immediately. We suggest testing your Pixel on multiple pages to confirm it works properly. Check on the Pixel’s functionality regularly. This will ensure that the data collected is on point.
Configure Events to Track Conversions
Once your Pixel is installed, let’s get to configuring events. Events are specific customer actions that you want to keep track of. This includes whether people are completing their purchase, not completing their purchase, or simply just viewing your pages. Facebook has a list of standard events. These are called PageView, AddToCart, and Purchase. It’s easy to set up and always needed for any business.
You can also customize what you want to track. This involves actions like granular tracking, which means that you’re trying to track when customers interact with a specific feature on your website. To make some custom events, you’ll have to modify the Pixel code. From there, you can add custom parameters to track. For this, you will need to make use of your technical skills.
Configuring events correctly is important for accurate data reports. Carefully plan which events you plan on tracking. Proper event setup allows you to gather the data properly so you can use it to optimize your ads.

Optimizing Facebook Ads With Meta Pixel
By now, your Pixel is up and running, and now it’s time to improve your ad campaigns. One effective marketing strategy is retargeting. This is where your ads go back out to people that have already been on your site once before. For this, you’ll need to create custom audiences which means you have to group specific customers according to the actions they take. By creating custom audiences, you can serve ads that are in line with customer interests. This doesn’t just improve your engagement but also enhances the conversion rates.
Another useful feature is lookalike audiences—groups of people that are a lot like the best customers you have. Your best customers are those users who are giving you what you want such as purchases. Doing this lets you reach new leads with a greater possibility of improving conversions. To make a lookalike audience, use the collected data to track key traits from your existing customers. Then, you have to use those traits to find similar audiences.
The Facebook Pixel also allows conversion optimization. By selecting the Conversions object in your ad campaigns, Facebook automatically sends your ads to users who are most likely to convert according to the data you’ve collected. This ensures your budget is spent well. Additionally, dynamic ads allow you to make your ads personal. This lets you showcase products people have already looked at or added to their cart once before.
Fixing Common Facebook Pixel Problems
Setting up the Pixel is easy but it’s also easy to run into problems. One common issue that developers have is duplicate Pixel files. This happens when the Pixel code is installed many times on one site. This error can lead to inaccurate data collection.
Another common issue is the Facebook Pixel not collecting data or collecting it incorrectly. This happens when the code is wrongly placed in your website’s HTML. Verify that the Pixel is in the <head> section of your website to fix this problem. Event misfires are a common problem. This is when the events are collected incorrectly. Always recheck your event parameters to ensure they’re set up the way you want.
The Pixel misfiring error can be fixed by using the Debugging Tab in the Events Manager. This lets you view real time firing so you can check if something is changing when it’s not supposed to, and that lets you find and fix problems easily. Test your Pixel from multiple devices. Through this, you’ll find if everything is working properly.
Checking the Pixel’s Data
You’ve got the Meta Pixel set up and working, but you also have to analyse all the info collected. Use Facebook’s reporting tools to review event data and measure conversion rates. This can include rates like cost/conversion. Analysing the data helps you understand how effective your advertising efforts are and where you need to do better work.
The Pixel also provides audience insights which help you refine the target audience based on metrics like behavior and interests. Experimenting with these can provide a clearer picture of customer behavior and when these actions are completed. Compare your data with industry data regularly to see how well you’re doing.
Always Remember Privacy and Compliance
The biggest concern people have is whether or not their data is being collected, and that’s what the Pixel does. You cannot set up the Facebook Pixel to collect data without letting your audience know. That’s because of privacy regulations like GDPR and CCPA. It’s important to notify your customer base about the collection of data in your privacy policy. Additionally, add a way to get their consent using cookie banners.
We recommend regularly checking up on Pixel Data to confirm there’s transparency and accountability. We also suggest you keep up with evolving privacy regulations. This prevents you from collecting any data that you’re not supposed to. You don’t want to have any legal problems. Staying active over privacy concerns ensures that you can create trust and loyalty with your customers.
The Bottom Line
Setting up the Facebook Pixel is step one for any marketing plan. It allows you to track conversions and improve your ad campaigns and this gives you a better idea of your customer base. By following what’s been listed above, you’ll be well on your way to make decisions backed by data that maximize the effort you put in your marketing.
You see, the Meta Pixel is more than just a tracking tool. It’s smarter advertising. By going over your metrics and parameters regularly, you can make campaigns that truly work with your audiences. Get to creating your Facebook Pixel and make the most of your marketing plan!

Sign up for SocialWick
Login
InstagramYouTubeTikTokFacebookTwitchSpotifyTwitter (X)SoundCloudIGTVLinkedInThreadsWebsitePinterestVKApple MusicSEO
Checkout
OK
Information
Order processing usually starts within a few minutes, but some services may take a few hours or even a few days. We offer free refills for up to 90 days if needed. Our services are 100% secure and discreet, with a focus on gradual and safe delivery for your peace of mind.
Order processing usually starts within a few minutes, but some services may take a few hours or even a few days. We offer free refills for up to 90 days if needed. Our services are 100% secure and discreet, with a focus on gradual and safe delivery for your peace of mind.
Service
+0,00
Voucher
-0.00
Total
+0.00
OK
Affiliate & Reseller Program
Customer Support
How may we help you?
General Support
Order Support
Frequently Asked Questions
1) What services do you offer?
We are a social media marketing company, and we offer a wide variety of services across several platforms that our clients can choose from. Once selected, we create a plan that fits your needs. We offer several types of services, such as followers, subscribers, likes, views, song plays, etc.
2) Is your service safe?
We only sell real social media signals, and we hold every service to strict authenticity and quality standards. We deliver every order carefully and gradually. We closely monitor all our services. For more information, we strongly recommend reading our Terms of Service before you order.
3) Will I need to give you the passwords for my accounts?
No, you can keep your passwords to yourself because our services don’t need a password to influence your accounts. And if an email ever shows up claiming to be from us and asking for a password, it’s definitely not us, so please let us know right away.
4) Are the likes, followers, and subscribers real, or are they bots?
Yes. All engagements come from real accounts operated by real people. You won’t find bots, fake profiles, or hijacked accounts anywhere in what we deliver. Every order has to pass our strict authenticity standards, and we keep checking our quality to make sure it stays that way.
5) How fast can you deliver my order?
We will show you the estimated delivery time when choosing the service. However, this is only a rough estimate. In most cases, the services are delivered much faster. In some cases, it may take longer. We always aim for a natural and safe delivery!
6) What are your best-selling social media marketing services?
Although we have many services across most social media companies, our services for Instagram, TikTok, YouTube, and X are our best-selling options.
7) How do I know my account will not be flagged or banned?
We take safety very seriously. We never ask for your password, all engagements come from real accounts, and orders are usually delivered gradually. What we can promise is careful delivery and strict quality standards. Plus a support team that’s there whenever you need us. We are not aware of a single case since 2017 where a customer got his profile banned.
8) What is the best method to communicate with you?
Do you have a question or run into a problem? Our customer support is available 24/7 for you. Just click Contact and you’ll land right on the support form. When you buy one of our services, we will email you to see if there were any problems. Your satisfaction is our main priority.
9) Are there discounts for large orders?
Yes! If you would like to request a large order that isn’t on our ordering layout, we will have no problems accommodating you. Just reach out through the support form and we’ll put together a plan that fits what you need.
10) What methods of payment do you accept?
We accept all forms of credit and debit cards, as well as Klarna, eps, and Crypto.
11) If I am unsatisfied with your services, am I able to receive a refund?
Yes! Every purchase comes with a 30 day money-back guarantee. Not satisfied? Just contact our support within 30 days of your purchase and send us your order details and a short note on what went wrong, and we’ll take a look at your case. The full conditions are in our Refund Policy.
12) I haven’t received my order
Please make sure the following criteria are met before placing an order to make sure we can deliver it successfully.
- Your account is set to public
- You have typed in the correct username or link
- You have not changed your username before the order’s completion
- The post or account still exists and has not been deleted
- The post or account has not been restricted or removed in some countries
- Allow the estimated delivery time for completion of your order
For further assistance, please message our support team through the contact form.
13) How can I request a refill?
Just send us a refill request through the contact form. Please note that we can only provide you with a free refill within the first 90 days of your purchase.
Learn More
What is SocialWick?
We are the leading marketplace for social media promotion. You can buy followers, likes, views, subscribers, and a lot more for almost all social media networks. We offer affordable prices without making any compromises in terms of the service quality. We have a strict policy to only sell social media signals from real people. Part of our engagement, for example, comes from ad-based promotion: real users discover the content through ads. Bots, fake profiles, and hijacked accounts have no place in our services. Every delivery has to meet our authenticity standards, and we run regular quality checks, and anything that does not meet them is removed from our catalog. Our services are available for personal use.
With over a million satisfied customers, SocialWick is the go-to platform for all your social media needs. Our services are discreet and secure, with gradual and careful delivery to keep your social media accounts safe.
About SocialWick — The Market Leader since 2017
With more than 10 million orders, SocialWick is one of the world’s biggest social media stores. You can find everything on our website to improve your presence on major social media platforms like Instagram, TikTok, YouTube, X, Facebook, etc. We offer different types of services for several social media platforms. Your wish is our command, and whatever your goal might be, SocialWick will help you achieve it. Whether you need more likes on your Instagram photos or want to make your LinkedIn profile more popular by getting additional followers, SocialWick is there to turn your goal into reality.
Thanks to our effective services and our customer-oriented work, SocialWick has become a top player. You will not find a better service anywhere else, especially not at such affordable prices. SocialWick is operating since 2017.
365 Days Per Year Customer Service
Your satisfaction is our motivation! We’re not here just for the money; we do our work to help people find their road to social media success. And that’s why our team will do all to make sure everything goes according to plan. If there’s something wrong with your social media campaign, or worry that there might be some problems with your account, or want to learn more about how our services work, feel free to reach out. Our service staff is there for you seven days a week, ready to answer any of your questions. You can get in touch with us using the contact form on our website.
Buying Followers and Likes is Essential
Unless you’re Kylie Jenner, you definitely need some help with social media. The more followers you have on Instagram, TikTok, Twitter (X), or YouTube, the more people will automatically notice you. Having all those eyes on your content isn’t just impressive, it’s genuinely fun. The bad news is that everyone wants to be famous these days, but only a few can succeed. The good news is that you can be the chosen one who will get social media fame and everything that comes with it. But, for that, you need a little help from your friends at SocialWick.
With our help, you will increase the number of followers on social media, which can have a domino effect and bring you even more new followers. Once people see that you got a big followership, they will decide to give you a follow. "If a profile has so many followers, it means that it’s interesting" – you can be sure this is going to be their reasoning. Furthermore, more followers mean more visibility for everything you post. Finally, a large number of followers also do great for your credibility. Our social media services will help you to create a better overall picture of your profile.
Let’s be honest; a profile with 30,000 followers looks much better than one with 74 followers. And that’s exactly what new visitors will pay attention to. A weak social media profile can be a real deal-breaker. At the same time, a fantastic social media profile can do wonders for you. And SocialWick can make your social media profile amazing!